How to Mount a Floating Nightstand and Save Bedroom Space
If your bedroom feels like a game of Tetris, you know the struggle. A bulky nightstand takes up floor space, makes vacuuming hard, and collects random items.
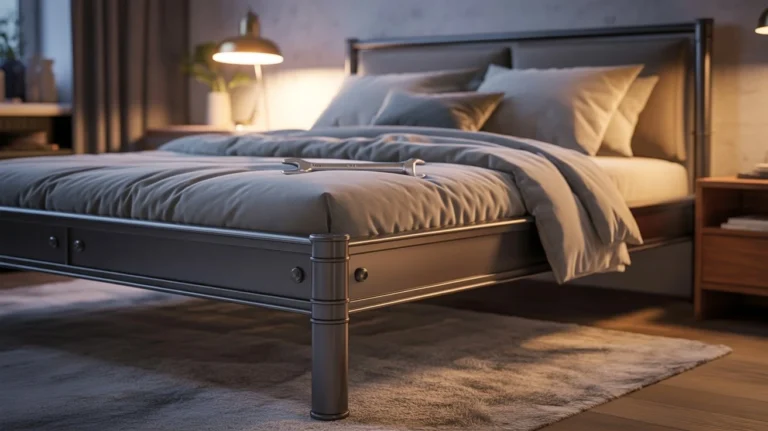
Mounting a floating nightstand is a smart upgrade and easier than you think.
I mounted my first floating nightstand on a lazy Saturday. I used a drill, a level, and no professional experience. If I could do it, so can you.
What You Need Before You Start
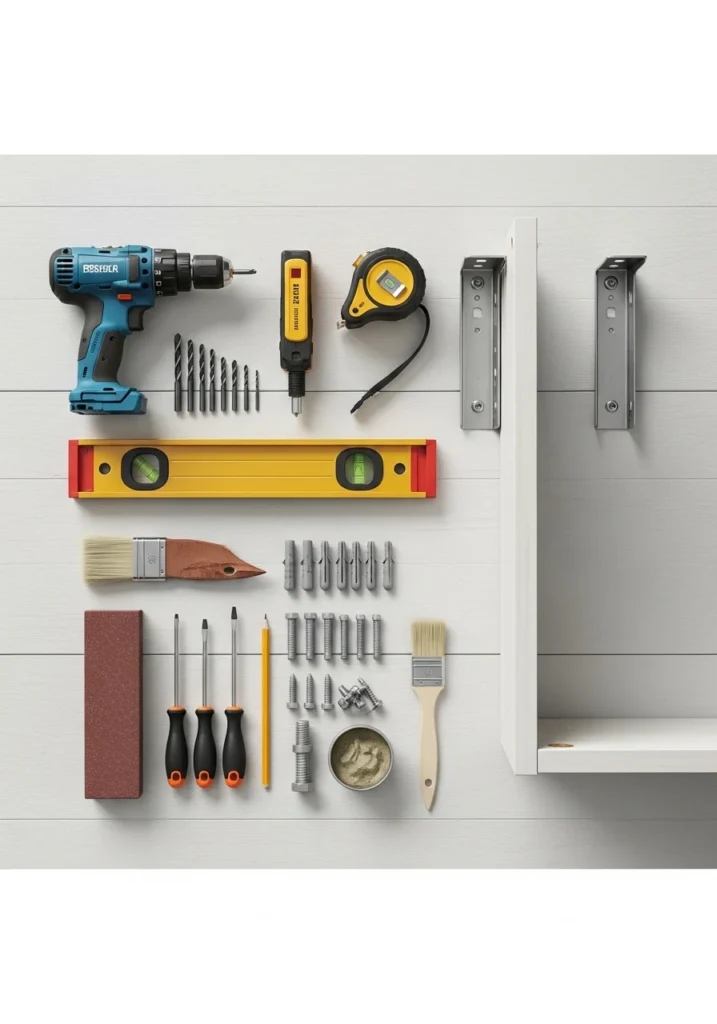
Let’s talk tools and materials. Walking into this project unprepared is how you end up with a crooked shelf and a hole in the wrong wall. Gather everything before you touch a single screw.
Tools
- Power drill with assorted drill bits
- Stud finder (non-negotiable, trust me)
- Level (a small torpedo level works perfectly)
- Tape measure
- Pencil for marking
- Screwdriver (flathead and Phillips)
- Sanding block or sandpaper if you are painting or finishing raw wood
Shop Tools And Supplies On Amazon
Materials
- Your floating nightstand or shelf unit
- Heavy-duty wall anchors or lag bolts (depending on your wall type)
- Screws appropriate for your bracket system
- Mounting brackets (many floating nightstands come with these, but buy extras just in case)
- Wood filler and paint for touch-ups if needed
One thing worth emphasizing here: match your hardware to your wall type. Drywall, plaster, brick, and concrete all need different anchors. Using the wrong ones is not just ineffective, it is a safety hazard.
Find Wall Mounting Hardware On Amazon
Step 1: Choose the Right Height
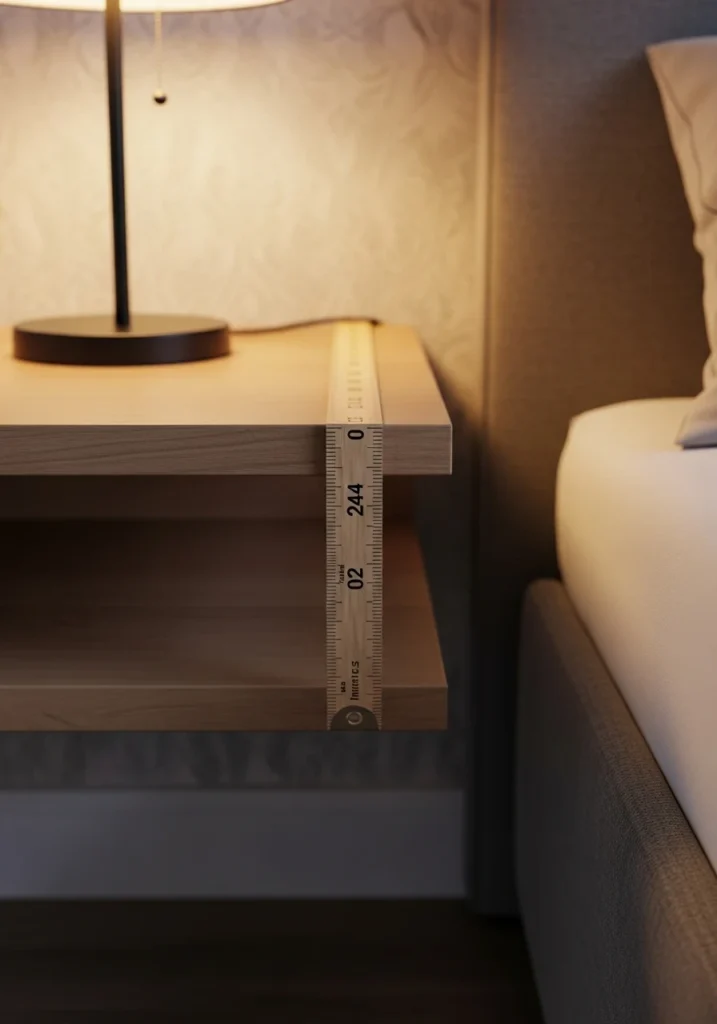
Before you drill anything, figure out where you actually want this nightstand to sit.
This sounds obvious, but a lot of people skip straight to measuring and end up with a shelf that is either awkwardly low or so high they need to reach up just to grab their phone.
A good general rule: mount your floating nightstand at mattress height or about 24 to 28 inches from the floor. That puts it right at arm’s reach when you are lying in bed, which is exactly where you want it.
Sit or lie on your bed and reach naturally to the side. That height is your sweet spot. Mark it lightly with a pencil.
Step 2: Find Your Studs
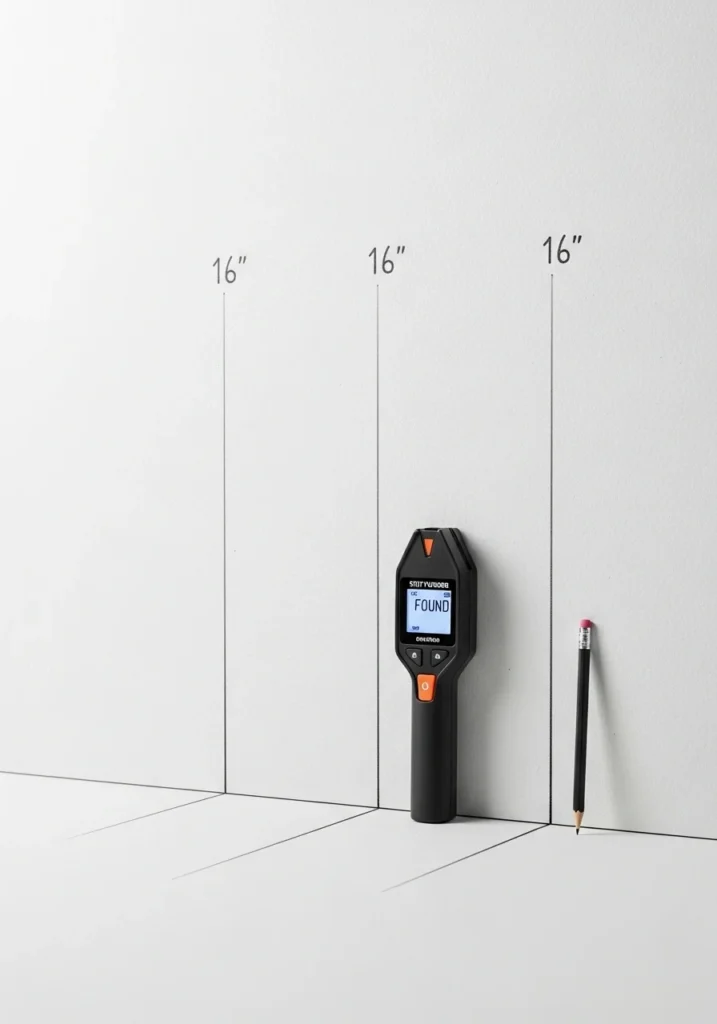
Here is where people get lazy and regret it later. Wall anchors are helpful, but if you can screw directly into wall studs, always do it.
Studs give you a solid, load-bearing connection that wall anchors simply cannot match, especially if you plan to put a lamp, books, or anything heavier than a glass of water on this shelf.
Run your stud finder slowly along the wall and mark each stud location with a pencil. Standard stud spacing in most homes is 16 inches apart, but do not assume. Always verify.
If your desired nightstand position does not line up with any studs, you have two solid options:
- Use heavy-duty toggle bolts, which grip the back of the drywall firmly
- Install a horizontal wood cleat that spans two studs, then mount your nightstand to the cleat
Option two is the stronger choice. It distributes weight evenly and gives you more flexibility in positioning.
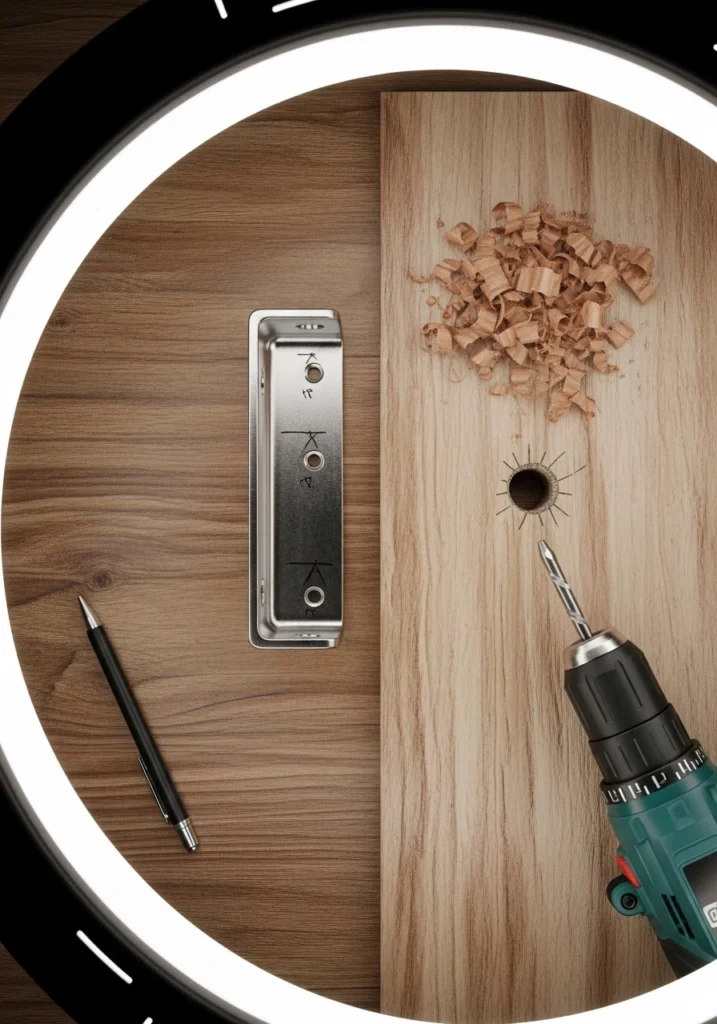
Step 3: Mark and Pre-Drill Your Holes
Now comes the satisfying part.
Hold your mounting bracket against the wall at your marked height, use your level to confirm it is perfectly straight (a millimeter off now becomes very obvious once everything is installed), and mark the screw hole locations with your pencil.
Pre-drilling is not optional. Driving screws into drywall or wood without pilot holes risks splitting the material and weakening the connection. Use a drill bit that is slightly smaller in diameter than your screws.
If you are drilling into a stud, drill straight and true.
If you are going into drywall alone with toggle bolts, follow the manufacturer’s instructions for hole size since toggle bolts need a specific clearance to open properly behind the wall.
Step 4: Install the Brackets
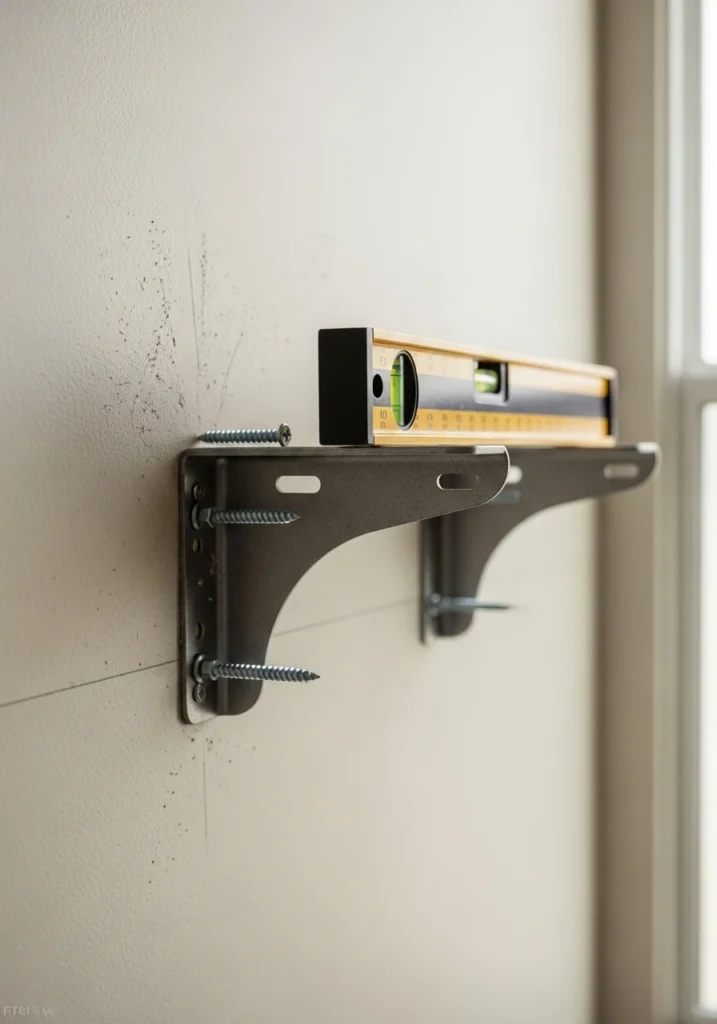
With your pilot holes ready, it is time to attach the brackets. Drive your screws or bolts in firmly, but do not overtighten.
Overtightening strips the hole and reduces your grip strength, which is the opposite of what you want.
Once the brackets are up, check them again with your level. It is much easier to make small adjustments now than after the nightstand is sitting on top.
If you are using a hidden bracket system (the kind where no hardware is visible once the shelf is mounted), slide the bracket channel onto the back of the nightstand first to confirm the fit before you commit to the wall position.
Some systems require very precise spacing that is hard to fix after the fact.
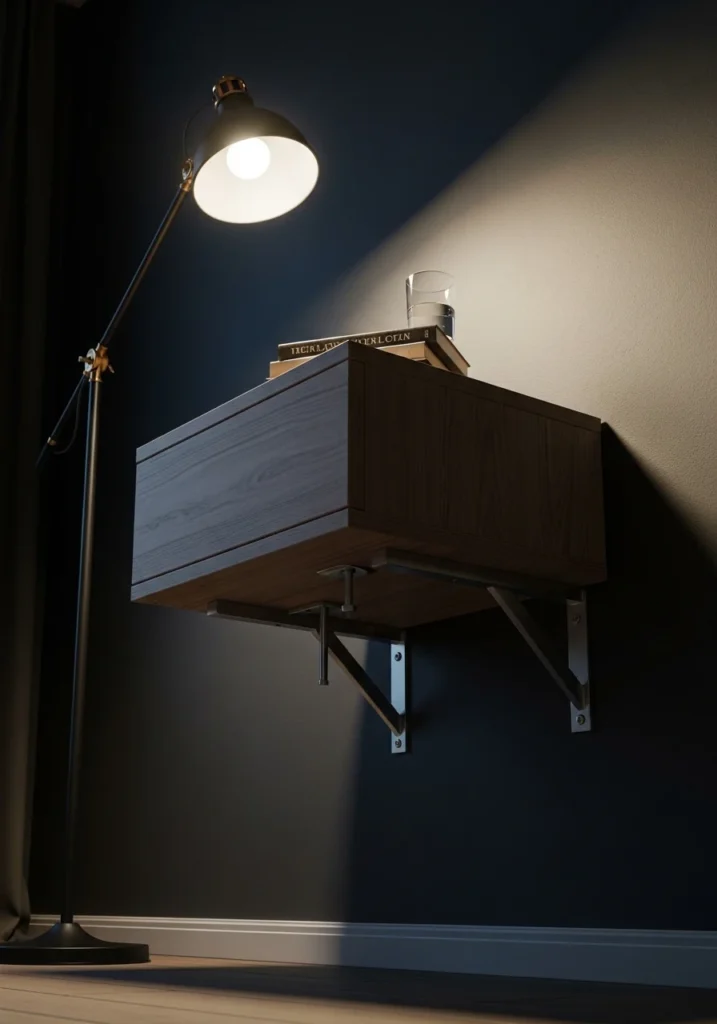
Step 5: Mount the Nightstand
This is the moment of truth. Depending on your nightstand style, you will either:
- Slide it onto mounted brackets (most common with floating shelf systems)
- Hang it on a French cleat (a diagonal interlocking cleat system that is incredibly strong)
- Bolt it directly through the back panel into the wall brackets
For most standard floating nightstand kits, sliding it onto the brackets is straightforward. Line it up, slide it forward, and feel it lock into place.
Some systems come with a small set screw underneath to lock the shelf permanently. Use it.
That tiny screw is what stops your nightstand from sliding off the bracket at 2 a.m. when you grab your phone in a hurry.
Give the installed nightstand a firm tug once everything is in place. It should feel completely solid with zero wobble. If it moves, something is not right and you need to revisit your anchor points.
Shop Floating Nightstands And Mounting Systems On Amazon
Step 6: Level Check and Final Adjustments
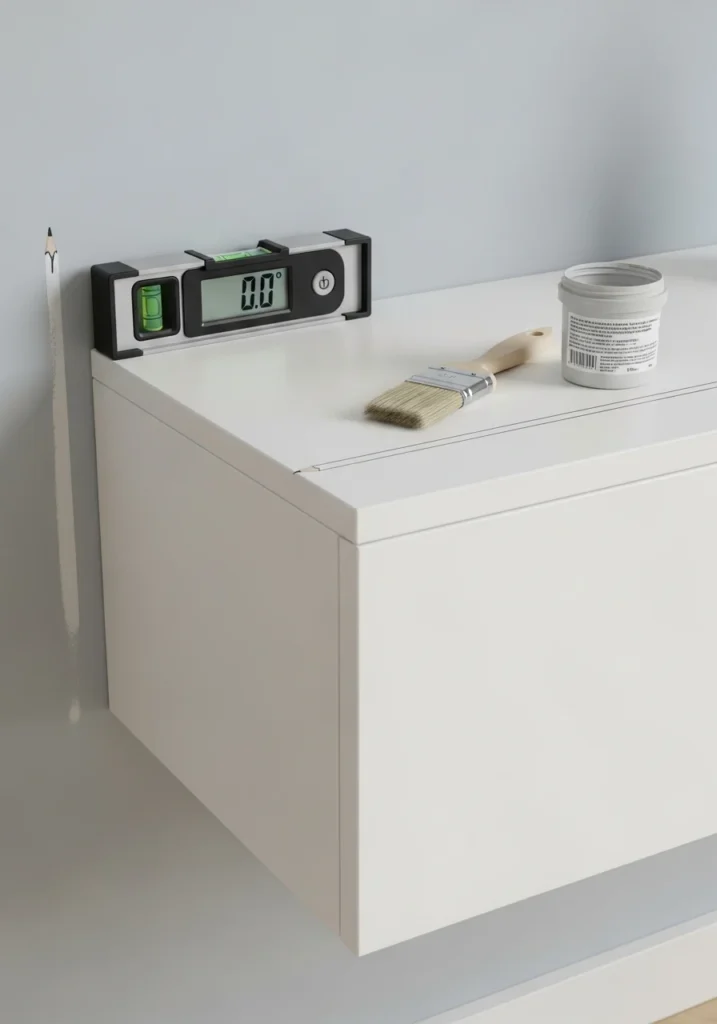
Step back and look at it. Use your level one more time for peace of mind. Is it straight? Does the nightstand overhang evenly on both sides if it is centered above the bed?
If something looks slightly off, some bracket systems allow minor adjustments by loosening the screws slightly, correcting the angle, and re-tightening.
Others do not, which is why getting it right in the earlier steps matters so much.
Touch up any pencil marks on the wall with a small amount of matching paint.
Fill any unnecessary test holes with wood filler, let it dry, sand it smooth, and paint over it. Your wall should look clean and intentional, not like a crime scene.
How Much Weight Can a Floating Nightstand Hold?
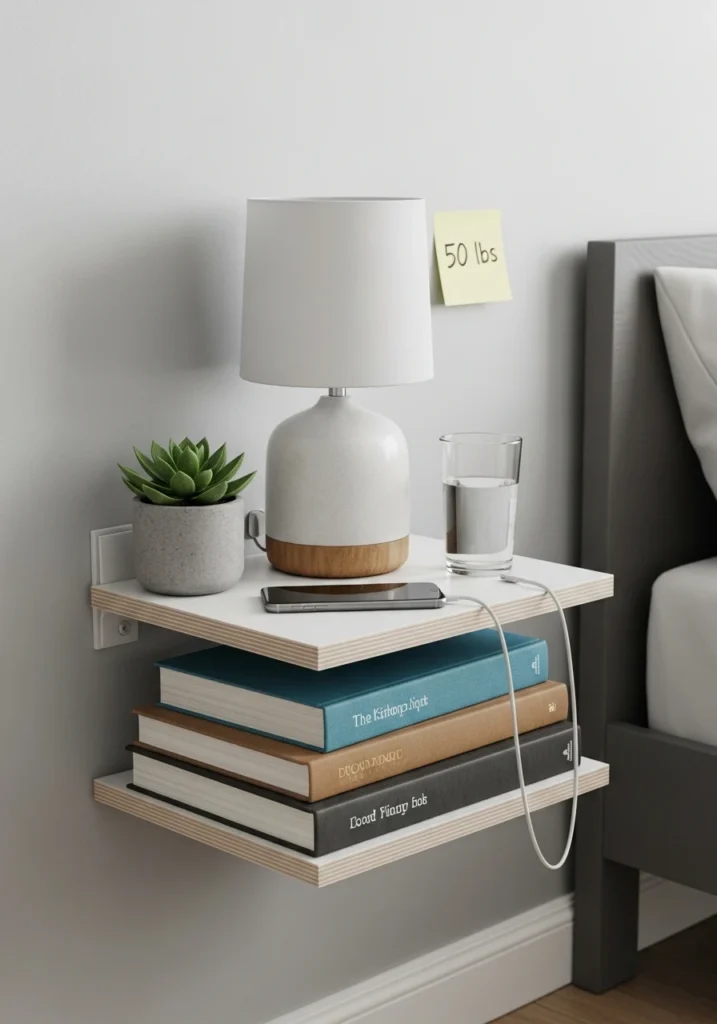
This is a fair question and one worth answering directly. The load capacity depends on three things: the quality of your brackets, the type of wall anchor used, and whether you hit a stud.
As a general guide:
- Screws into studs can support 50 to 80 pounds or more per screw
- Quality toggle bolts in drywall typically support 20 to 40 pounds depending on size
- Cheap plastic anchors often fail under 10 to 15 pounds
A typical floating nightstand with a lamp, a book, a phone, and maybe a small plant sits well within safe limits if you install it properly.
Just do not use it as an impromptu step stool, because that is a different kind of floating experience entirely.
Tips for Saving Even More Bedroom Space
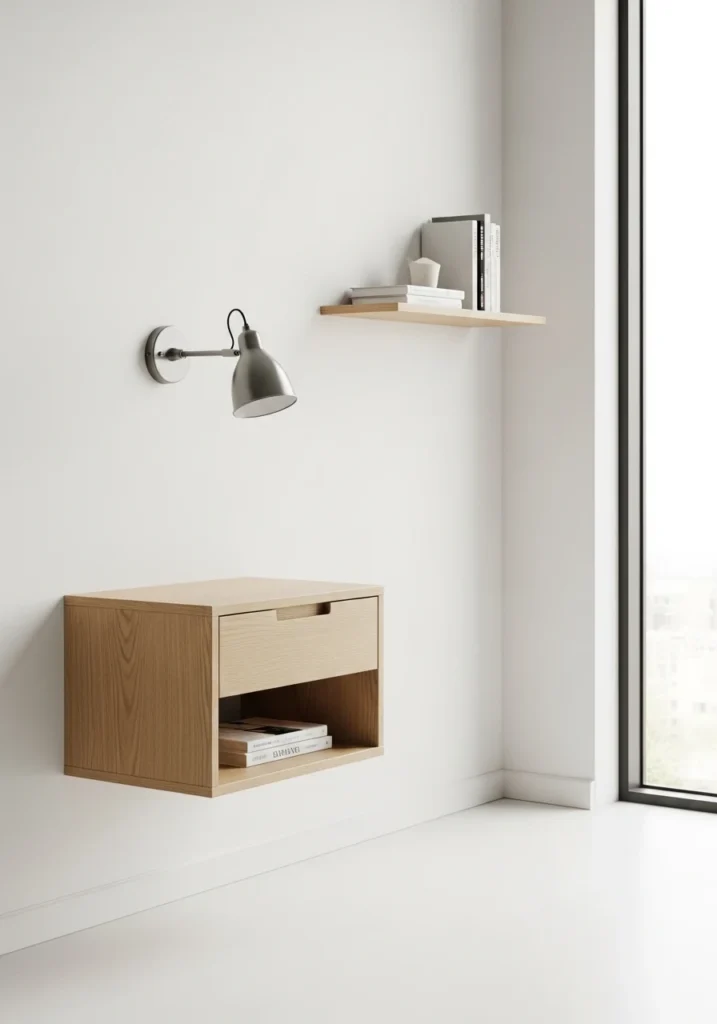
Since you are already upgrading to a floating nightstand, here are a few extra moves that make a real difference in a tight bedroom:
- Choose a nightstand with a drawer or shelf built in so you eliminate the need for additional storage furniture
- Use vertical wall space above the nightstand for a small wall sconce instead of a table lamp, which frees up the entire surface
- Mount two smaller floating shelves instead of one wide one if you have a narrow wall section, which gives you the same function with less visual bulk
- Go for lighter finishes like white, light wood, or open-back designs that make the room feel bigger rather than cluttered
None of these are groundbreaking interior design secrets, but small decisions like these stack up and genuinely transform how spacious a bedroom feels.
Explore Bedroom Storage Solutions On Amazon
Wrapping It Up
Mounting a floating nightstand is one of those home projects that sounds more complicated than it actually is.
Once you gather the right tools, locate your studs, and take your time with the measurements, the whole job takes about an hour. The payoff, though, lasts as long as you live in that space.
You reclaim floor space, you get a cleaner look, and you stop stubbing your toe on that enormous wooden base at midnight.
That last point alone might be worth the entire effort. Grab your drill, trust the process, and enjoy the extra breathing room in your bedroom.
What Type of Wall Anchor Should I Use for a Floating Nightstand?
The right wall anchor depends on your wall type. For drywall, heavy-duty toggle bolts work best. They grip the back of the wall panel and spread weight evenly.
For plaster walls, use metal toggle anchors rated for your load. If you can screw directly into a stud, skip the anchors. Use lag bolts or structural screws instead.
Always check the anchor’s weight rating before installation. Never use basic plastic expansion anchors for anything heavier than lightweight decor.
How High Should a Floating Nightstand Be Mounted on the Wall?
The best height for a floating nightstand is 24 to 28 inches from the floor. This usually matches the top of a standard mattress. To find your ideal height, lie down on your bed and reach to the side.
Where your hand rests comfortably is where the nightstand surface should be. Remember, if you have a taller mattress, like one with a thick pillow top, you might need to raise the height a bit.
Can a Floating Nightstand Hold a Lamp and Other Bedroom Essentials?
Yes, a properly installed floating nightstand can hold a lamp, books, a phone, and a glass of water. When you mount it into wall studs with structural screws, each screw supports 50 to 80 pounds or more.
Quality toggle bolts in drywall can handle 20 to 40 pounds safely. The key term is “properly installed.”
A shelf fixed with cheap plastic anchors or misaligned brackets won’t hold up. So, investing in the right hardware from the start is crucial.
Do I Need a Professional to Install a Floating Nightstand?
You don’t need a pro for this project. Mounting a floating nightstand is a simple DIY task. Most homeowners can finish it in about an hour with basic tools.
You’ll need a power drill, a stud finder, a level, a tape measure, and the right hardware for your wall type.
If you take your time measuring, find your studs correctly, and use good brackets, the installation is easy.
However, if you’re renting and want to avoid wall damage, or if your walls are brick or concrete, getting a handyman is a smart choice.
What Is the Best Bracket System for Mounting a Floating Nightstand?
The best bracket system depends on your desired look and the weight you want to support. Hidden floating shelf brackets offer a clean, hardware-free look and suit lighter loads.
French cleats are great for heavier nightstands since they spread weight over a wider area and are very secure.
Standard L-brackets are the cheapest choice and work well when screwed into studs, but they remain visible after installation.
Most floating nightstand kits from furniture stores include a suitable bracket system, as long as you install it correctly into solid wall material.